
Apple Pay Merchant Certificate Configuration
Overview
Apple Pay's web integration allows users to complete payments directly through Apple Pay in the Safari browser on web pages. To implement Apple Pay on your website, you need to perform some configuration and development work, including generating necessary keys, creating payment requests, handling payment authorization, etc. Below is a basic step-by-step guide that explains the process of integrating Apple Pay Web using the Non-hosted approach. Compared to the Apple Pay Hosted approach, the Non-hosted approach requires developers to implement the interaction flow with Apple Pay UI themselves.
1. Register Apple Developer Account
First, you need to have a valid Apple developer account and join the Apple Developer Program. This is a prerequisite for using the Apple Pay Web API.
2. Apply for Certificate
Please send the application materials to the email address acq-tech@pingpongx.com, and CC to acq-ts@pingpongx.com
- Merchant name
- Merchant AccId
- Merchant ClientId
After PingPong's acquiring team receives the application email and completes the required configuration, they will reply to the merchant with the certificate as an email attachment.
3. Create a Merchant Identifier on the Apple Developer Platform
Creating a merchant identifier (Merchant ID) on the Apple Developer Platform is one of the key steps in integrating Apple Pay. The merchant identifier is used to identify your business and ensure payment process security. Below are the detailed steps to create a Merchant ID. If you already have a merchant identifier, you can skip this step.
Log in to Apple Developer Account
- Open the Apple Developer platform.
- Log in to your Apple Developer account.
- Enter the Apple Developer Center.
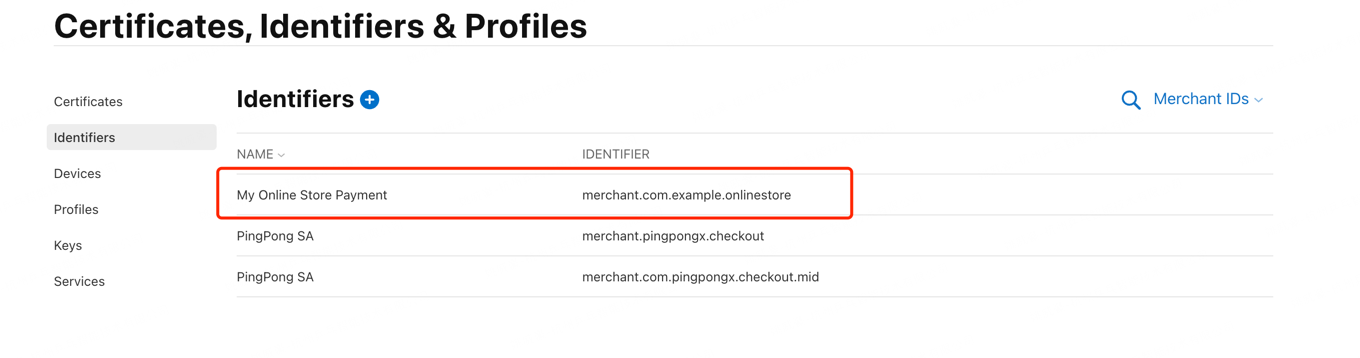
- In Apple Developer, select "Identifiers".
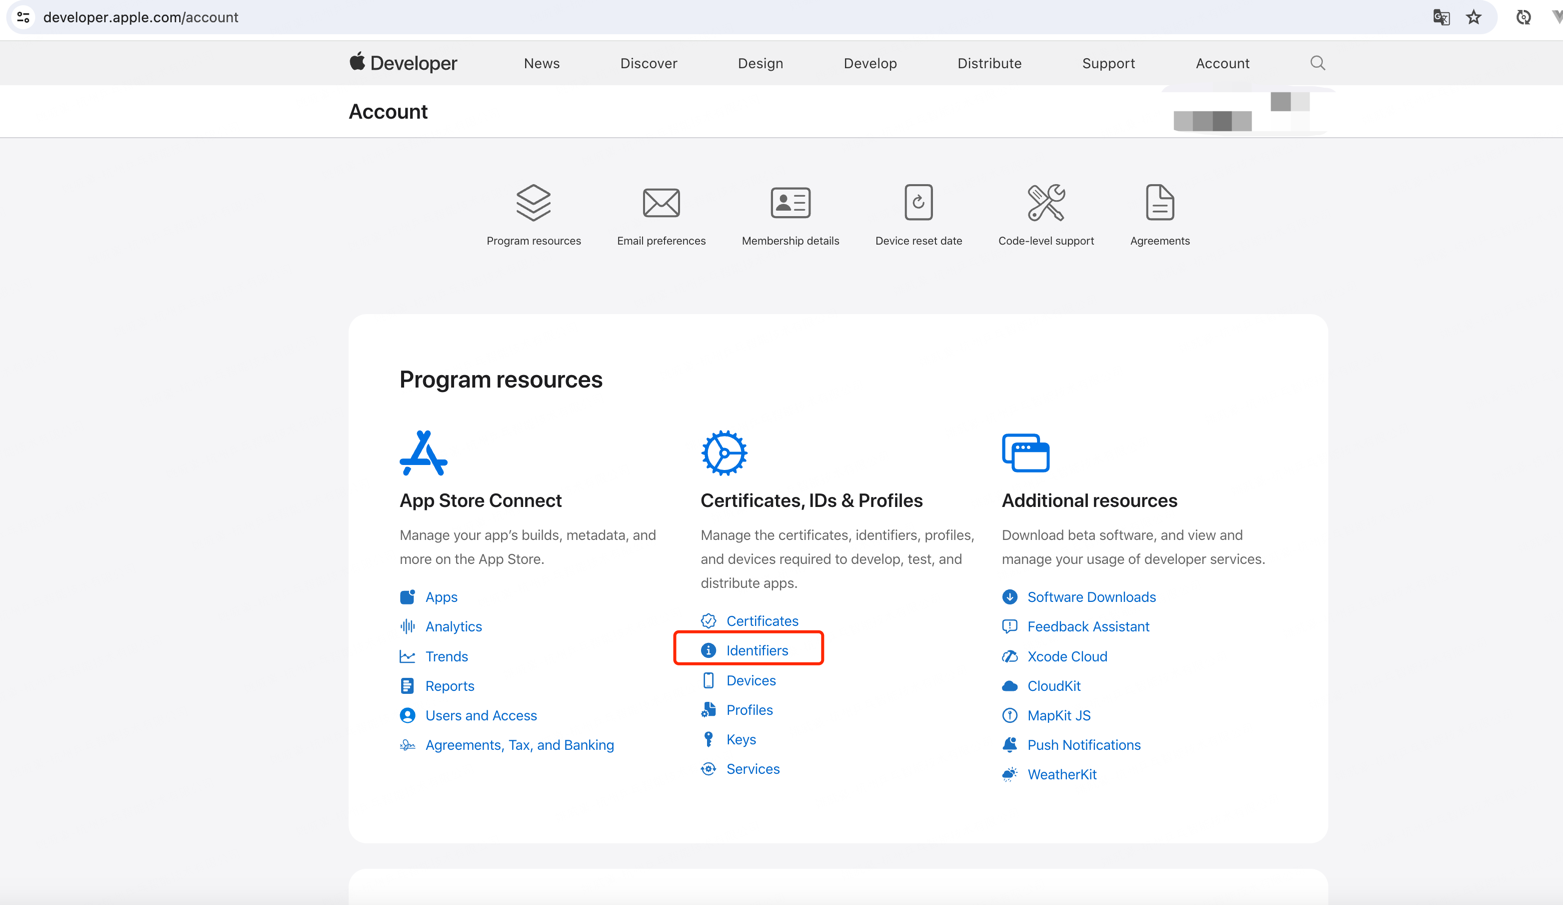
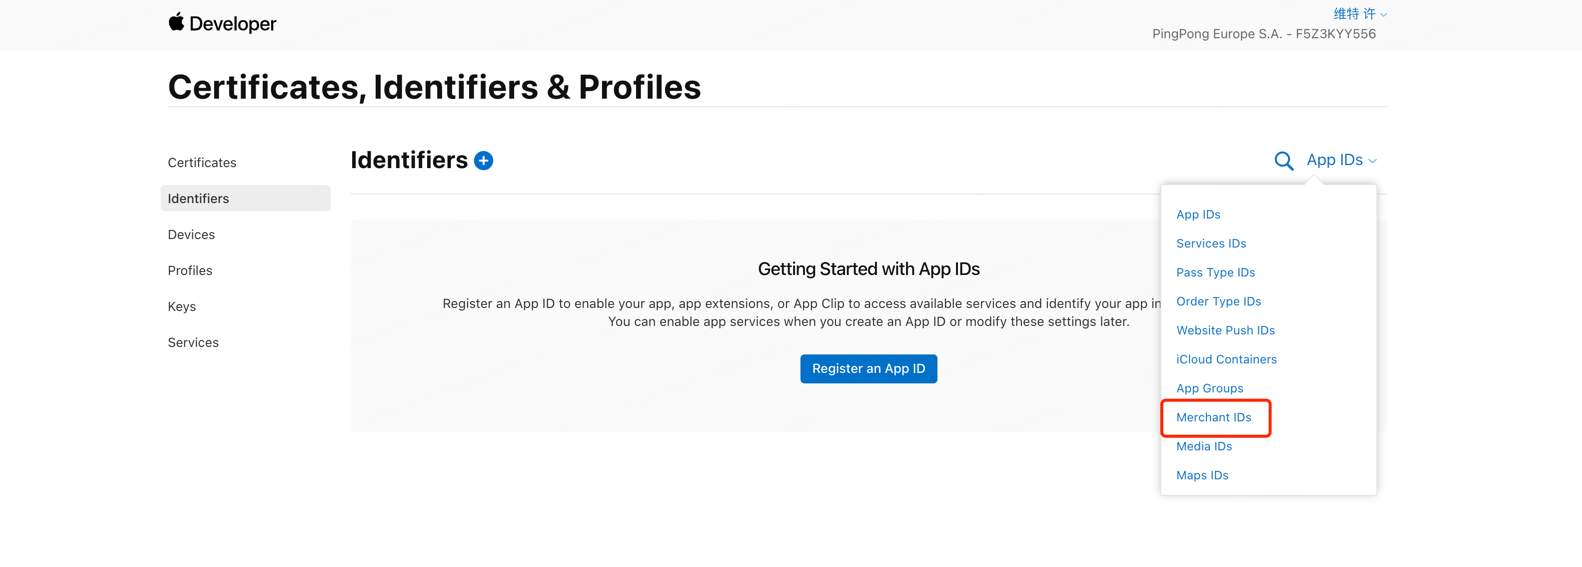
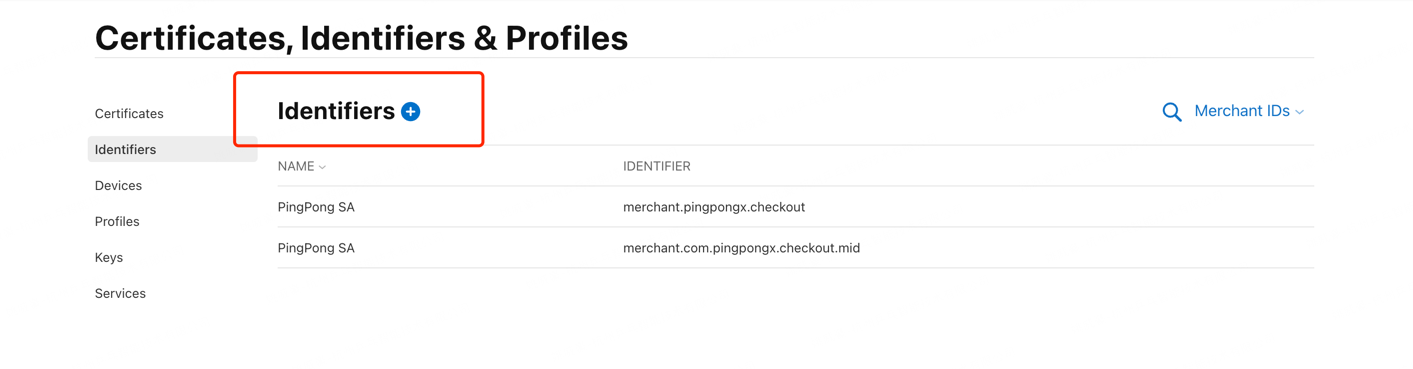
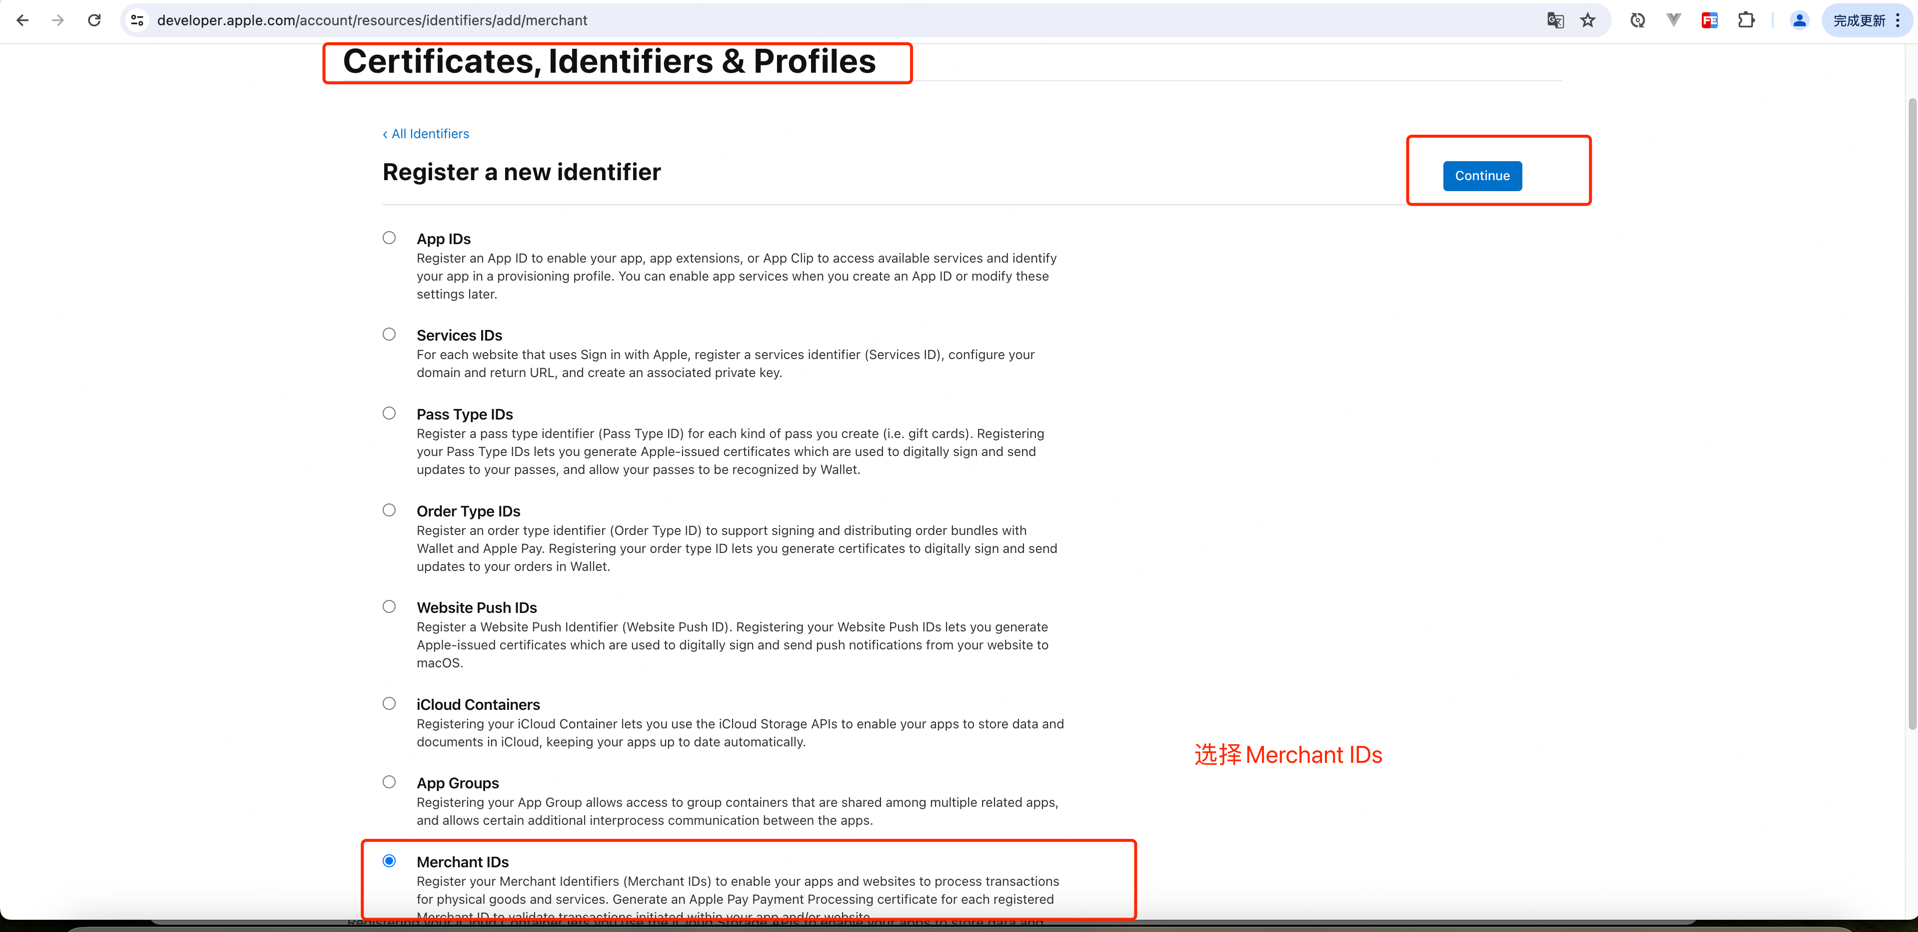
Enter Basic Information for Merchant Identifier
- Enter a descriptive name, which will help you identify different merchant identifiers in your projects. For example: "My Online Store Payment".
- Enter the Merchant ID identifier, usually starting with merchant., such as merchant.com.example.onlinestore. This identifier needs to be unique and is typically associated with your domain name for consistency.图 1
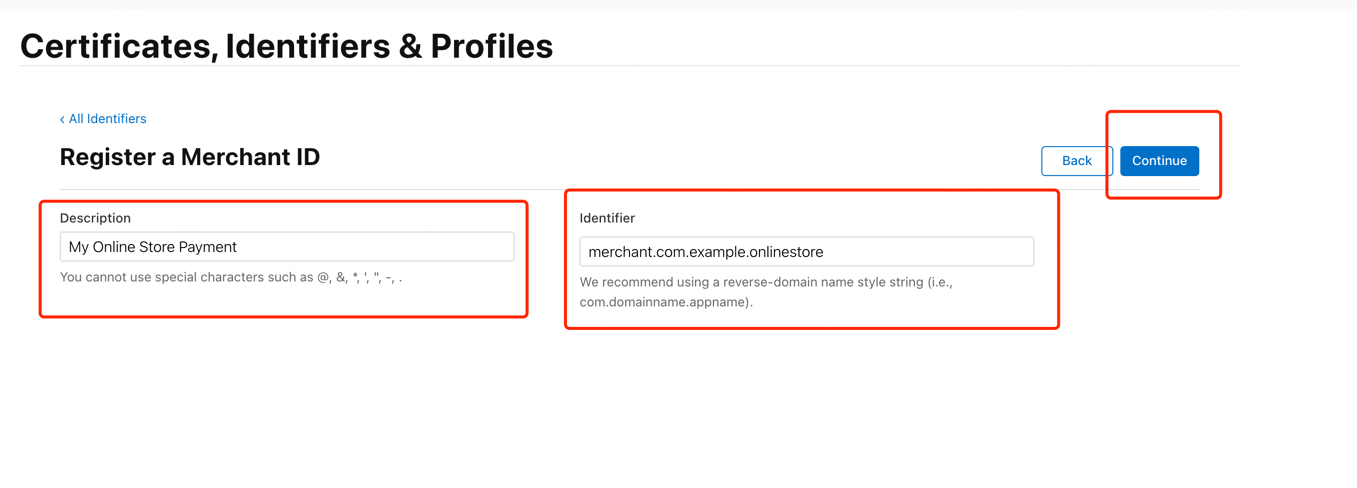
At this point, you have successfully created the merchant identifier.
4. Add Certificate to Merchant Identifier
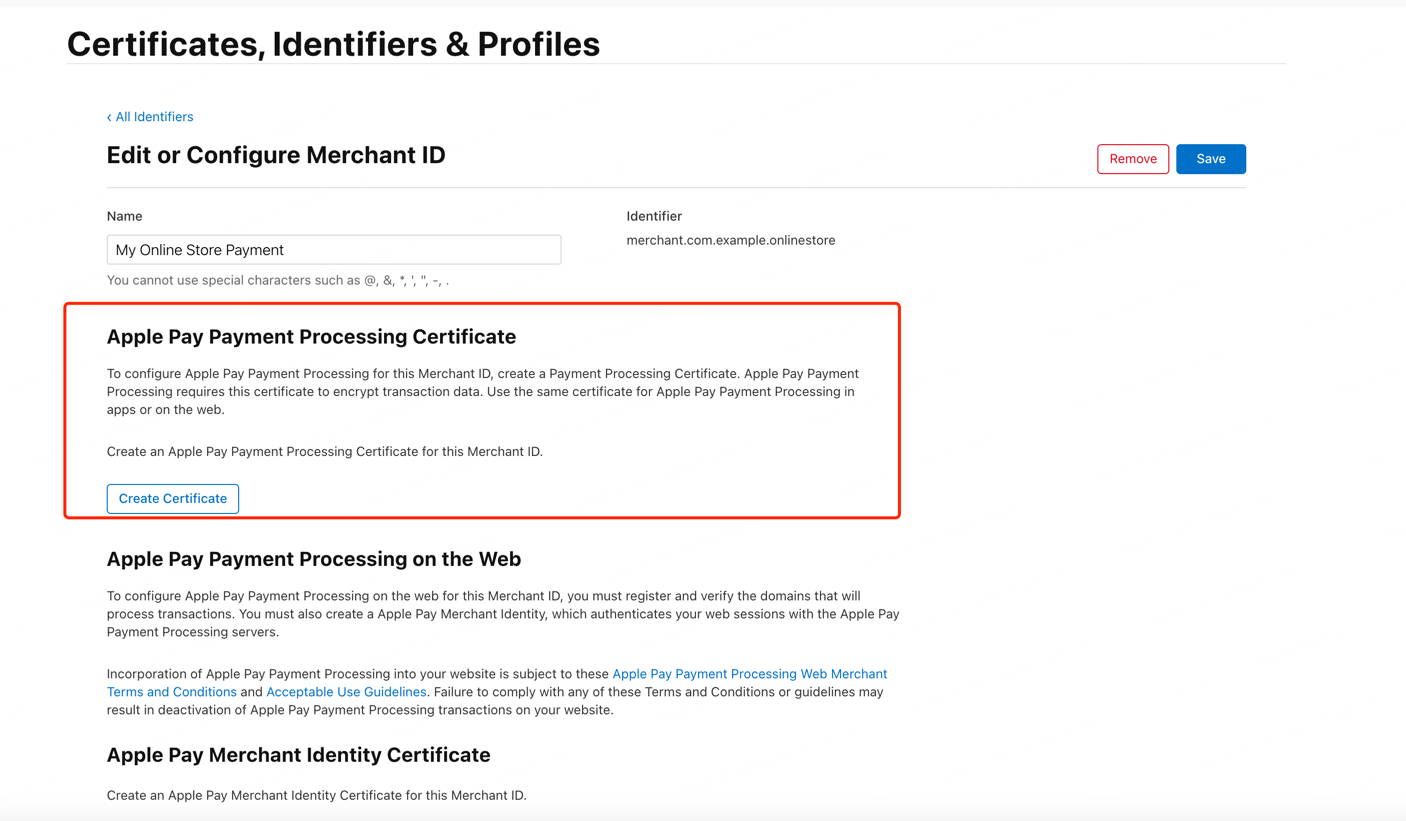
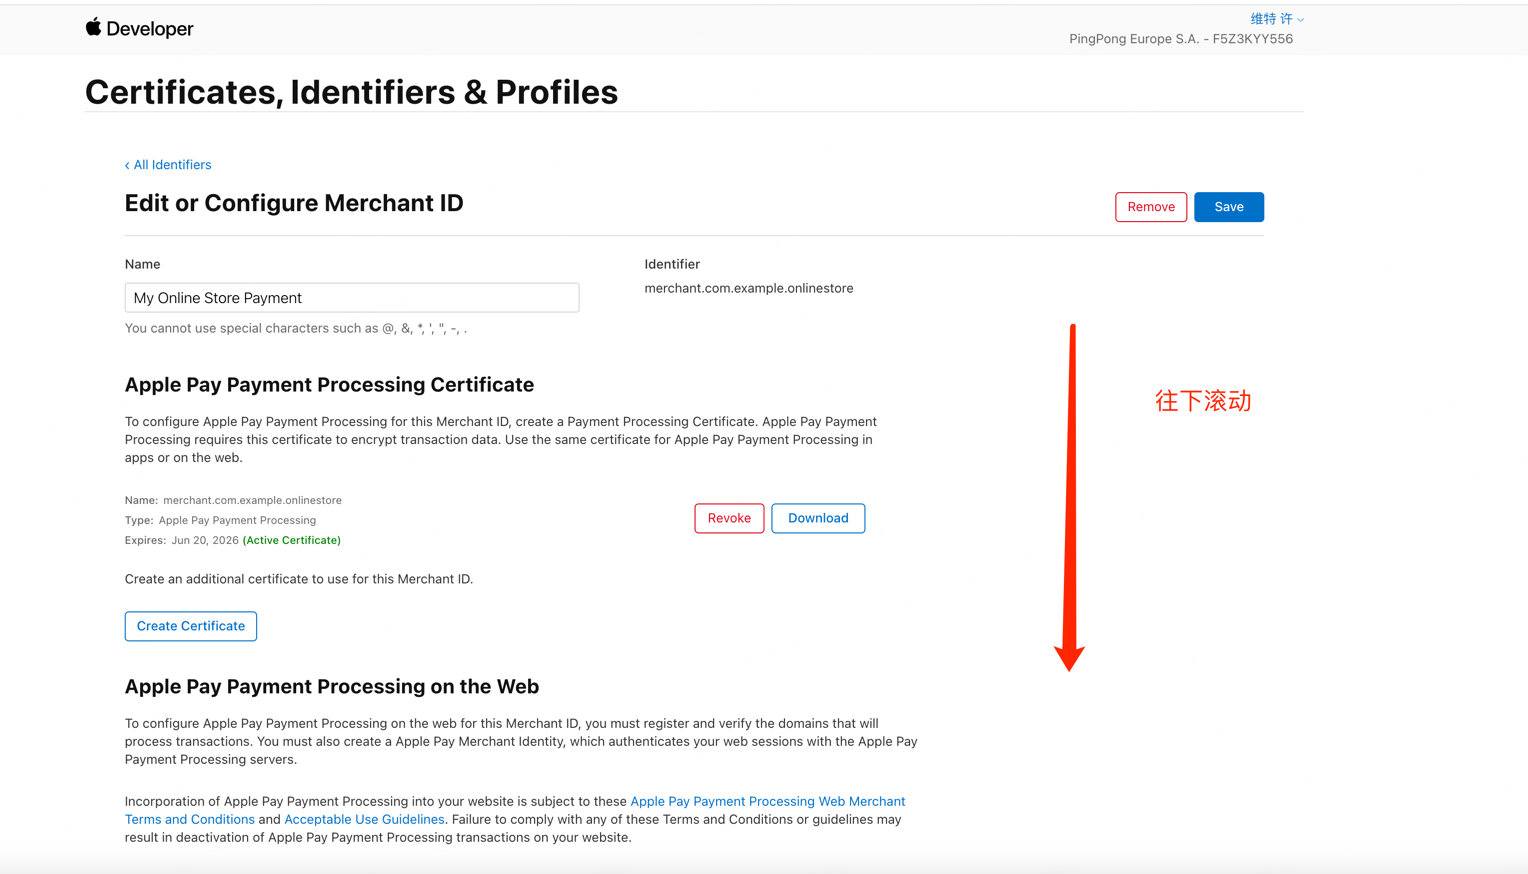
- Return to the merchant identifier list, click on the currently created merchant identifier, and enter the details page.
- On the details page, click Create Certificate under Apple Pay Payment Processing Certificate.
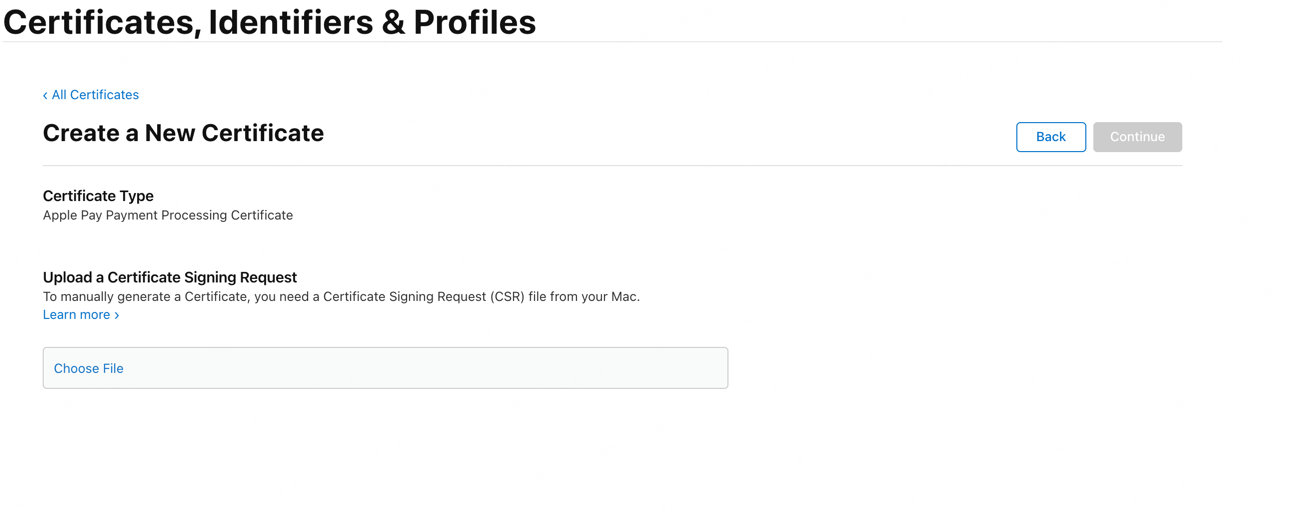
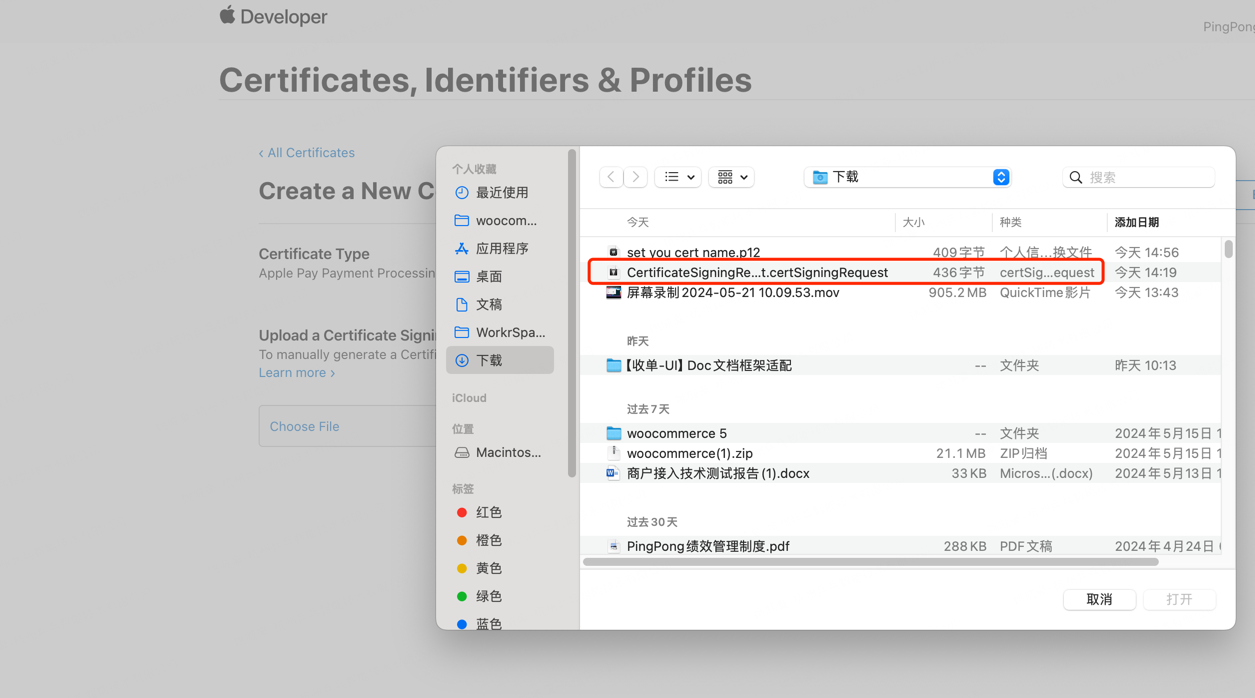
- Click chooseFile
- Upload the certSigningRequest type file from the email attachment in the previous steps
5. Download Your Certificate
- Click Download to download the certificate.
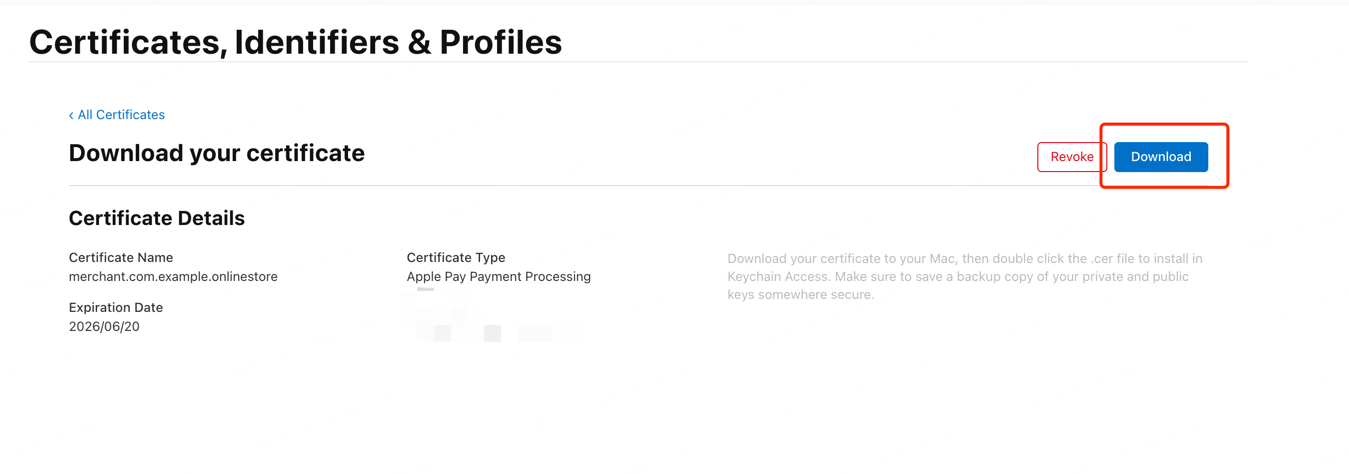 图 1
图 1 - After the download is complete, you will get a
.certype file

6. Merchant Domain Verification
Note
Domain verification is only required for Apple Pay Web integration. If using Native SDK integration, domain verification is not required.
- Enter the merchant identifier list, click on the currently created merchant identifier, and enter the details page.
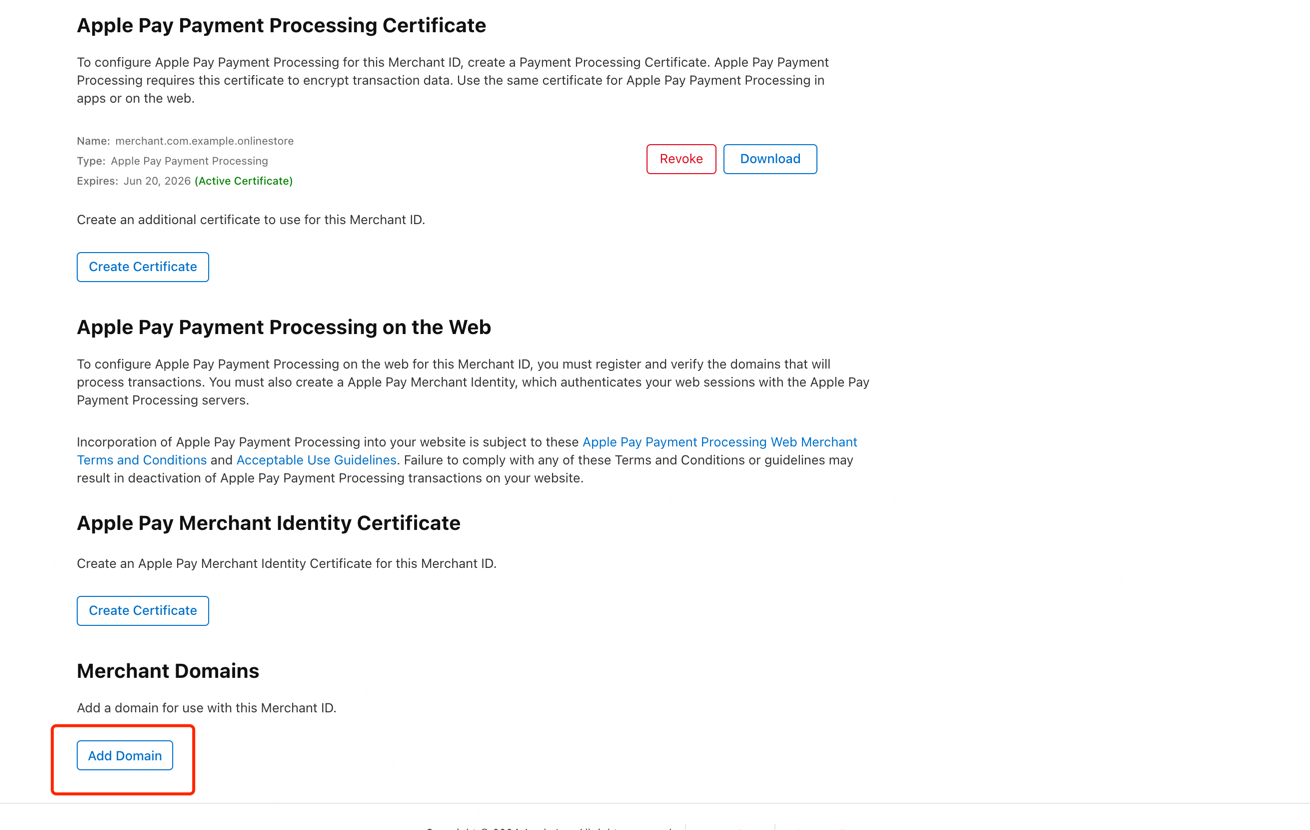
- Scroll down on the details page
- Click Add Domain
- Fill in your domain name
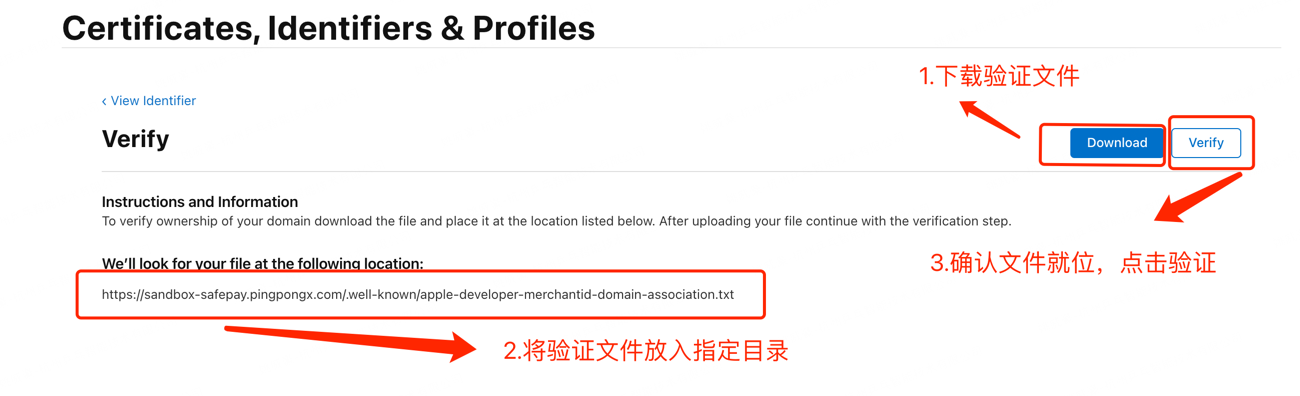
- Click the Download button, you will get an
apple-developer-merchantid-domain-association.txtfile, which contains a string pre-generated by Apple. Apple will later request your server to retrieve the content for verification. - Upload your file to your server and place it in the location specified by Apple.
Note
- As shown in the figure, the domain verification file is placed in the
.well-knowndirectory under the web service root directory. - The filename must be
apple-developer-merchantid-domain-association.txt. - The domain verification file content must match the string pre-generated by Apple.
- You can access
https://yourdomain.com/.well-known/apple-developer-merchantid-domain-association.txtin your browser. If the returned content matches, it indicates successful verification.
- If verification is successful in the browser, you can click Verify to verify.
7. Exchange Certificate Information with PingPongPay
Please send the following information to the email address acq-tech@pingpongx.com, and CC to acq-ts@pingpongx.com
.cerfile- Your domain that has been verified
Additionally, please keep the .certSigningRequest file for future use.